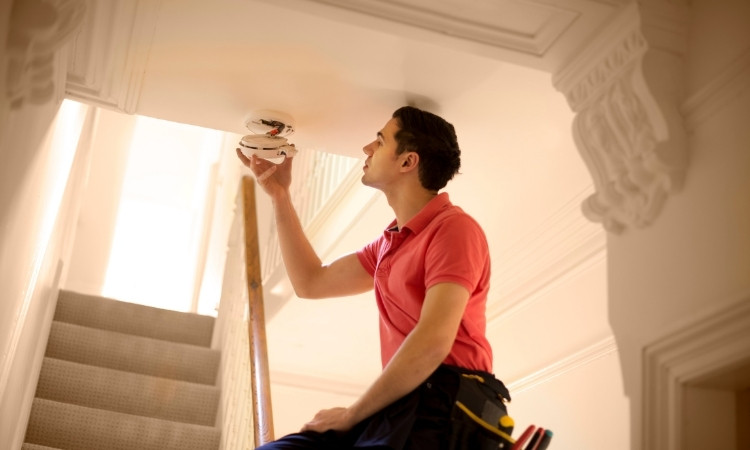
A smoke detector is no longer optional for condos, HDB apartments, and any high-rise building. It’s the law to have one installed under the fire safety regulations to avoid getting fined. It gives you an alert when it senses any heat, fire, or smoke, so you can find a safe escape before the fire escalates. However, now you may wonder, how to install a smoke detector in Singapore?
You may not want it done by a professional, as they may charge you a hefty amount. Don’t worry, you don’t need one either, as we’re going to teach you how to do that step by step in this article yourself. Moreover, LS Electrician Servicing Singapore’s detailed process is a guide on this matter. Let’s also not forget their efficient services in house rewiring, power failure troubleshooting, and lighting protection system domains.
Benefits of Installing A Smoke Detector
There are many benefits of installing a smoke detector in Singapore. These include:
- It alerts you the moment it senses any fire, giving you enough time to safely escape from the place.
- It protects not only you but your loved ones, like kids and elderly family members, as well.
- Helps prevent major property damage
- Brings peace of mind, even when you are asleep or away
- Meets safety rules for new homes in Singapore
- A simple and low-cost way to improve home safety
How To Install A Smoke Detector? Step-By-Step Guide
You can install a smoke detector at your home in Singapore all by yourself. Every step is clearly mentioned below that you can follow to do it. Let’s get to the guide.

Pick a Good Spot
First off, you need to pick the right place. Smoke rises, so the detector needs to go on the ceiling. If that’s not doable, high on a wall works too, just don’t stick it in a corner where air barely moves.
Avoid placing it near any stove or the shower, as it may make the detector give you false signals.
Grab What You Need
You don’t need a fancy toolbox for this. A drill, some screws, a pencil, and a ladder should cover it.
Most smoke detectors come with their own bracket and screws anyway. Don’t forget the battery if it’s battery-powered. Makes no sense to climb up there only to come right back down for it.
Mark Your Spots
Hold the bracket where you want the detector and mark the screw holes with a pencil. Simple as that.
It saves you from guessing later and drilling random holes like you’re playing darts. Double-check its level before you move on; better now than when you’re halfway done.
Get Those Holes Drilled
Now, take the drill and make your holes right where you marked them. If it’s drywall, you’ll want to use anchors to keep the screws tight.
Don’t rush it, a wobbly hole means a wobbly detector. Once you’ve drilled, clean off the dust so you’re not mounting it over a dirty surface.
Pop In the Anchors
If your wall or ceiling isn’t solid wood, anchors are a good idea. Push them in gently so they sit flush, no sticking out, no falling inside.
They’re the little things that keep your detector from dropping on your head later. If they don’t fit, check your drill bit size before forcing them in.
Attach the Bracket
Line up the bracket with the holes or anchors, then screw it in. Hand-tight is good; cranking it too hard could crack it or mess up the wall.
The bracket should sit nicely and flat. If it’s crooked or wobbly, loosen the screws and adjust it now, not after you’ve snapped the detector on.
Put the Battery In
Open the detector’s battery spot and pop the battery in the right way around. Match the plus and minus signs.
Close it back up tight. Some models will beep when you do this, and if it doesn’t, no big deal. You’ll test it in a minute anyway.

Mount the Detector
Line it up with the bracket and twist it on until it clicks or locks, depending on the design. Give it a light tug just to make sure it’s secure.
You don’t want this thing falling off after a week. If it feels loose, check the bracket again or see if you’ve got it lined up right.
Give It a Test
Push the test button and hold it down for a few seconds. It should beep loudly enough to make you blink.
If it doesn’t, check the battery or pop it off and try again. You’d rather know now than when you actually need it. Every detector has a test feature; use it.
Do the Rest of the House
One smoke detector isn’t enough. You need them in bedrooms, hallways, and spots where people hang out.
Repeat the same steps for each one, and don’t skip the test on any of them. A few extra minutes now can make all the difference later if something goes wrong.
Final Words
Installing a smoke detector in Singapore, either in your home, condo, or HDB flat, can be a lifesaver. In high-rise residences, it’s common for fire to spread fast, giving you way less time to escape.
The smoke detector detects fire, smoke, and heat on time, giving you enough time to easily escape the building with your loved ones. However, how to install a smoke detector in Singapore?
Follow these easy steps: The first step is to select a ceiling or high wall where smoke rises, mark holes with the bracket. Drill into the marks, push in anchors if needed, and screw the bracket on tight.
After that, put the battery in and close the cover, then twist the detector onto the bracket. Press the test button to check it works. Repeat these steps for every room.
