
One day, I flipped the light switch in my kitchen and nothing happened. I tried again. Still no light. There was a faint click on the switch, but the lights did not turn on. That’s when I realised I needed to replace faulty electrical switches, a task I had never done before.
Living in Singapore, where the weather is humid year-round, electrical switches can wear out faster than expected. Whether you’re in an HDB flat or a landed property, faulty switches are common. But the good news? If the issue is simple, you can handle it yourself without calling an electrician.
This guide will show you how to replace faulty electrical switches safely, step by step. LS Electrician Services Singapore explains how to replace faulty electrical switches in Singapore. It is important to note that their professional power socket installation and power failure troubleshooting services need no introduction in Singapore.
Common Signs of a Faulty Electrical Switch
Before you begin, it’s important to know when a switch needs replacing. Here are the most common signs:
- The light doesn’t turn on even after several tries
- There’s a delay or flicker when the light comes on
- The switch feels loose or gets stuck
- You hear a crackling or buzzing sound
- There’s a faint smell of burning plastic
If you notice any of these problems, it’s time to consider replacing faulty electrical switches in Singapore.
What You’ll Need for Faulty Electrical Switches Replacement
Make sure you have these tools and materials ready before you begin:
- A new switch
- Screwdrivers (both flathead and Phillips)
- A voltage tester
- Insulating tape
- Safety gloves
- A flashlight (useful if the lighting is poor)
You can buy switches from local shops like Choo Chiang Marketing or hardware sections at Home-Fix, Lazada, or Shopee. Always choose switches approved for Singapore use.

How to Replace Faulty Electrical Switches:
1. Turn Off the Power at the DB Box
Every Singapore home has a distribution board (DB box). Open it and switch off the circuit connected to the faulty switch. If you’re unsure which breaker it is, turn off the main power for safety.
2. Test for Live Current
Use your voltage tester to make sure there’s no electricity flowing through the switch. This step is very important. Do not skip it.
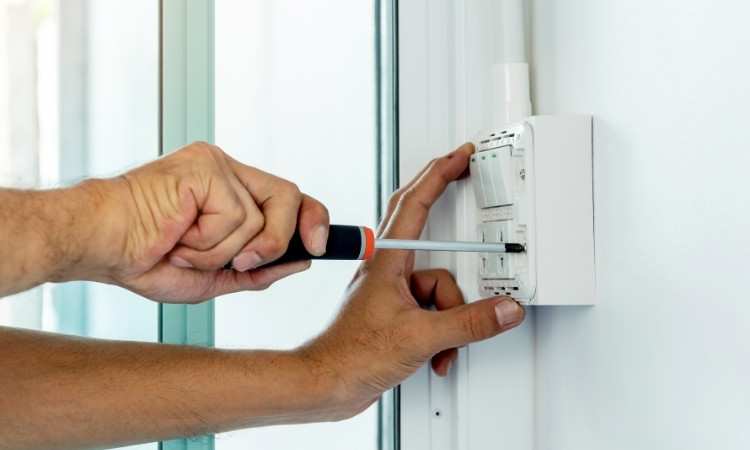
3. Remove the Switch Cover
Take a screwdriver and remove the faceplate of the switch. Set the screws aside in a small container so you don’t lose them.
4. Unscrew the Faulty Switch
With the power off, use your screwdriver to unscrew the switch itself from the wall. Take your time during this step. If the switch is stuck, gently wiggle it to loosen it. Be careful not to damage the wires during this process.
5. Disconnect the Wires
After you can view the wires connected to the switch, be sure to note the connections. Typically, you’ll find three wires:
- Live wire (usually red or brown)
- Neutral wire (blue or black)
- Earth wire (green/yellow)
Take a photo of the wiring setup to ensure you reconnect them correctly later. Carefully unscrew and disconnect each wire from the old switch. If the wires are tight, use your screwdriver to loosen them gently.
6. Connect the New Switch
Plug your new switch in and wire the switches to their respective terminals. The live wire goes to the terminal “L”, the neutral wire to “N”, and the earth wire to the earth terminal. Tighten each screw securing it as tightly as possible, but do not overtighten as this may damage the wires.
7. Secure the New Switch in Place
Push the wired switch back into the wall and screw it into position. Then, reattach the faceplate using your screwdriver.
8. Turn the Power Back On
Go back to your DB box and turn the power back on. Test the switch to confirm it’s working properly. If the light turns on smoothly and there are no sounds or delays, you’ve done it right.
When You Should Not DIY
If you see burnt wires or if the wall socket feels warm to the touch, don’t attempt the repair. Also, avoid DIY if you’re dealing with multiple switches connected to one light. In Singapore, any electrical work beyond basic replacements must be done by a licensed electrician.
Why Switches Fail in Singapore Homes
The tropical climate in Singapore causes higher moisture levels, which can lead to corrosion inside the switch. In older HDB flats, the wiring may also be outdated. Many homeowners still have the old round pin switches, which wear out faster. In such cases, it’s not enough to just replace old electrical switches; the wiring may also need upgrading. For complete rewiring needs, consider house re-wiring.
Benefits of Replacing Faulty Electrical Switches Yourself
- Saves money on small jobs
- Easy to do with basic tools
- Improves safety in your home
- Gives you confidence to handle simple repairs
Even a small problem like a faulty electrical switch replacement can prevent bigger issues later on, like short circuits or fire hazards.
Conclusion
Now you know how to replace faulty electrical switches safely and correctly in a Singapore home. With the right tools, some patience, and some attention to detail, it is something that you can do yourself. Always remember that if the job seems complicated or unsafe, hire a professional.
But for small, simple replacements, you now have the confidence and knowledge to handle it on your own. Don’t wait for the problem to get worse. Take action and change old electrical switches before they become a bigger risk.