Understanding how to test voltage with a multimeter is a valuable skill for both homeowners and professionals. A multimeter is one of the most essential tools for diagnosing electrical problems. It allows you to test both AC (alternating current) and DC (direct current) voltage, enabling you to troubleshoot home appliances, circuits, and batteries. However, if used incorrectly, it can pose risks. In this comprehensive guide, we’ll walk you through the process of using a multimeter to measure voltage, along with crucial safety tips to ensure you stay safe while working with electrical systems.
What Is a Multimeter and When Should You Use It?
A multimeter is a versatile tool that measures electrical properties such as voltage, current, and resistance. It’s a staple in every electrician’s toolkit and is also valuable for anyone dealing with electrical systems. A multimeter can come in two forms: digital and analog.
- Digital Multimeters (DMM): These are the most common type today. They display the reading on a digital screen, making it easier to read and interpret the values. Digital multimeters tend to be more accurate, user-friendly, and widely used for voltage testing.
- Analog Multimeters: These use a moving needle to indicate measurements. While they’re less common today, analog multimeters are still used for specific applications where a fluctuating reading may be needed.
The primary use of a multimeter is to measure voltage (either AC or DC), but it also measures current and resistance. In this article, we will focus on how to use it for voltage testing, which is one of the most frequent tasks homeowners and electricians need to perform.
When Should You Use a Multimeter?
Multimeters are used in a wide variety of scenarios. Here are the most common situations where you would want to use a multimeter to test voltage:
- Testing Wall Outlets: To ensure your electrical outlets are working properly and providing the correct voltage (typically around 230V in Singapore).
- Checking Batteries: To measure the voltage of batteries (e.g., AA batteries, car batteries) and determine if they are still functional or need replacing.
- Diagnosing Faulty Appliances: When an appliance stops working, a multimeter can help check whether it’s receiving the correct voltage.
- Troubleshooting Circuits: In the event of electrical issues like flickering lights or malfunctioning appliances, a multimeter helps pinpoint problems in circuits.
For everyday use, a multimeter is invaluable when you want to make sure that everything from your home’s outlets to your electronic gadgets are functioning safely and properly.
How to Use a Multimeter to Test Voltage
Now that you understand what a multimeter is and when to use it, let’s walk through the process of measuring voltage. The steps will vary slightly depending on whether you’re testing AC voltage or DC voltage, but the overall process is relatively straightforward.
How to Test AC Voltage with a Multimeter
Testing AC voltage is one of the most common uses of a multimeter, especially when you want to check the voltage in wall outlets or appliances. Here’s how you can do it:

Set the Multimeter to AC Voltage Mode
Turn the dial on your multimeter to the setting for AC voltage (V~). Most digital multimeters will automatically adjust to a suitable range, but if you have an older model, make sure you select a range that can handle the expected voltage (typically 200V or 600V).
Insert the Test Leads:
The black lead goes into the COM (common) port, and the red lead goes into the VΩma port. These ports are typically marked on the multimeter.
Test the Outlet
Insert the black (negative) probe into the neutral slot of the outlet (the larger slot) and the red (positive) probe into the hot slot (the smaller slot). For a 3-prong outlet, be sure to avoid the ground port.
Read the Multimeter
Once the probes are in place, the multimeter will display the voltage of the outlet. A typical household outlet in Singapore should show around 230V AC. If the voltage reading is significantly lower or higher, there may be an issue with your electrical system.
Verify and Double-Check
Always double-check the voltage you’re testing to ensure accuracy. If the outlet’s voltage seems off, it’s best to consult an electrician. If your outlet reads significantly higher or lower than 230V, it could indicate a neutral wire fault; in such cases, contact our emergency electrician immediately to prevent fire hazards.
How to Test DC Voltage with a Multimeter
Testing DC voltage is essential for checking batteries or low-voltage electronics. Here’s how to measure DC voltage:
Set the Multimeter to DC Voltage Mode
Turn the dial to DC voltage (V=). Digital multimeters will typically have this setting clearly marked, so there’s no confusion between AC and DC settings.
Insert the Test Leads
The black (negative) lead goes into the COM port, and the red (positive) lead goes into the VΩma port.
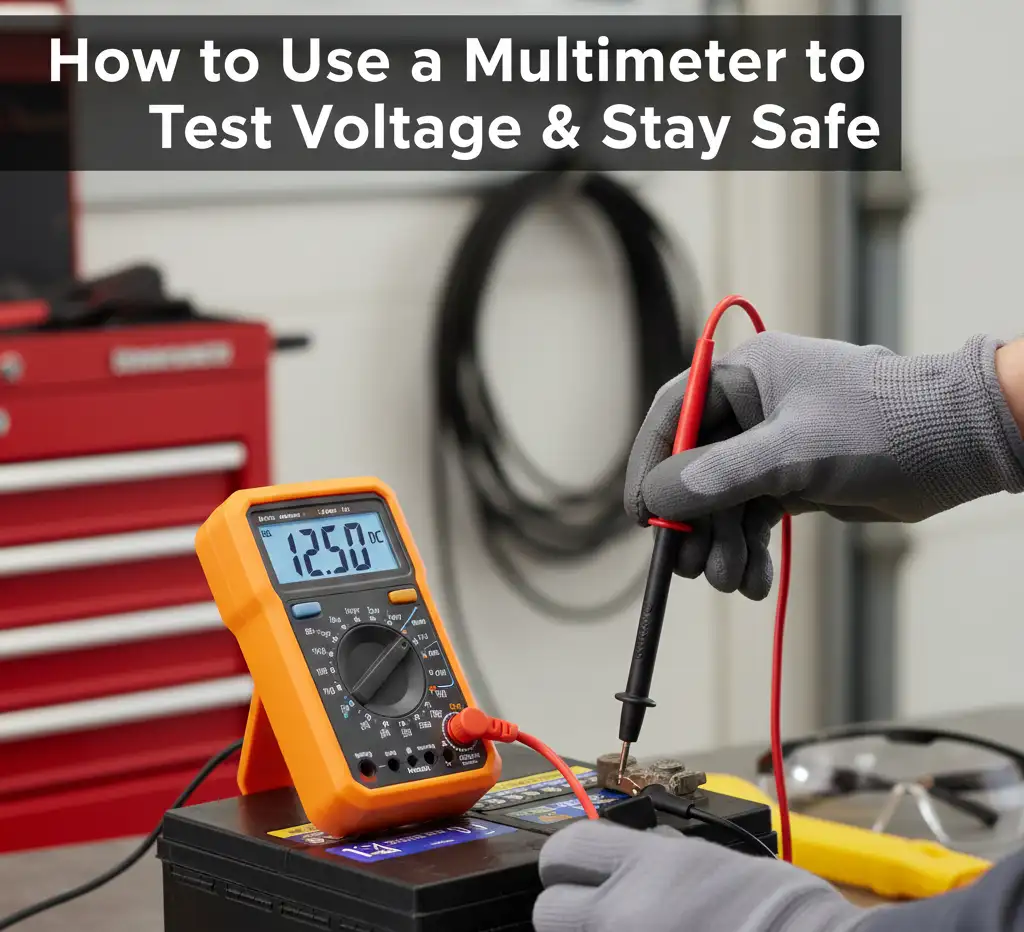
Test the Battery or Device
To test the voltage of a battery or device, place the black probe on the negative terminal and the red probe on the positive terminal of the battery or device. Make sure the probes don’t touch each other, as this can short-circuit the battery or device.
Read the Multimeter
The display will show the DC voltage. For example, a standard AA battery should show around 1.5V, and a 12V car battery should read around 12.6V when fully charged.
Verify the Results
Compare the reading on the multimeter to the expected value for the device or battery you are testing. If the voltage is lower than expected, the battery or device may be malfunctioning or need replacing.
How to Measure Voltage Using a Voltmeter
If you have a voltmeter (which is a more basic version of a multimeter, designed specifically for measuring voltage), the process remains the same. Just ensure that the voltmeter is properly set for AC or DC voltage, depending on your test. The main difference between a voltmeter and a multimeter is that a voltmeter is dedicated solely to measuring voltage, while a multimeter can test voltage, current, and resistance.
Safety Tips for Using a Multimeter
Working with electricity can be dangerous, so safety is paramount when using a multimeter to test voltage. Always ensure your tool is CAT-rated for the voltage you are testing, following standard electrical safety protocols to avoid arc flashes or electrocution. Here are essential tips to ensure you stay safe:
1. Always Set the Multimeter to the Correct Mode
Before starting, always check that the multimeter is set to the correct mode, AC or DC voltage, depending on what you’re testing. Using the wrong setting can lead to incorrect readings or, worse, damage to the multimeter.
2. Never Touch the Metal Parts of the Probes
When measuring voltage in live circuits, never touch the metal parts of the test leads. Only hold the insulated part of the probes. Touching the metal parts can lead to electric shocks or short circuits.
3. Work in a Dry, Safe Environment
Ensure you’re working in a dry environment to avoid the risk of electric shock. Moisture can create a path for electricity to flow to unintended areas, increasing the danger of electrocution. Always work in an area free from water or dampness.
4. Double-Check the Test Leads and Connections
Before measuring voltage, double-check that the test leads are securely connected to both the multimeter and the circuit. Loose connections can result in inaccurate readings or create a hazard.
5. When in Doubt, Call a Professional
If you feel uncertain about your ability to use the multimeter correctly, or if you suspect a serious issue with the electrical system, it’s always best to consult a licensed LS Electrician Service. Electrical work can be hazardous, and it’s better to seek expert assistance when necessary.
Advanced Multimeter Uses and Troubleshooting Techniques
Now that you’ve learned how to test voltage, let’s explore some additional advanced techniques for using your multimeter to diagnose and troubleshoot more complex electrical issues. Understanding how to use your multimeter beyond basic voltage testing can save time and help you avoid unnecessary repairs.
How to Use a Multimeter to Detect a Fault in an Electrical Appliance
A multimeter is a powerful tool for troubleshooting faulty electrical appliances. If an appliance is malfunctioning, testing the internal electrical components with a multimeter can help pinpoint the problem.
Step-by-Step Guide:
- Turn off the appliance and unplug it: Ensure that the appliance is not powered on before testing.
- Set your multimeter to measure resistance (Ohms): You’ll likely be checking continuity in wires or internal components.
- Test the wires: Use the multimeter probes to check the wiring in the appliance. If there’s no continuity, the wire may be broken.
- Check the internal components: Test the switch, motor, or any other component that could be causing the issue. If the component has no continuity, it may need to be replaced.
This method can help you identify faulty parts in your appliances without needing to disassemble them completely or guess at potential issues.
How to Use a Multimeter to Check if Batteries Are Flat
Testing batteries with a multimeter is a simple process and an excellent way to determine if a battery is still viable or needs replacing. Here’s how to check a battery’s charge:
- Set the multimeter to DC voltage mode: Set the dial on your multimeter to measure DC voltage, as batteries are DC power sources.
- Insert the test leads: The black (negative) lead goes into the COM port, and the red (positive) lead goes into the VΩma port.
- Place the probes on the battery: Touch the black probe to the negative terminal and the red probe to the positive terminal of the battery.
- Read the voltage: Compare the reading with the battery’s nominal voltage. For example:
- A 1.5V AA battery should read near 1.5V if it’s fully charged.
- A 9V battery should read close to 9V.
If the reading is significantly lower than the expected voltage, the battery is likely flat and needs replacing.
This technique helps you quickly identify whether a battery is still usable or needs a recharge.
How to Use a Multimeter to Measure Continuity
Another powerful feature of your multimeter is the continuity test, which checks if a circuit or wire is complete and free from breaks. This function is incredibly useful for troubleshooting:
- How to Test Continuity:
- Set the multimeter to the continuity setting: On most multimeters, this is represented by a symbol resembling a soundwave or diode.
- Check the leads: Place the multimeter probes at both ends of the wire or circuit.
- Listen for the beep: If the circuit is intact and there is continuity, the multimeter will beep. If there’s no sound, the circuit is broken, and the wire or connection is faulty.
Continuity testing is commonly used to check for short circuits, faulty connections, or broken wires in appliances and electronics.
Common Mistakes and Troubleshooting Tips
Even experienced users make mistakes when using a multimeter. Most common errors and offer troubleshooting advice to help you avoid potential issues while testing electrical systems. Using a multimeter can sometimes be tricky, especially for beginners. Here are some common mistakes to watch out for:
- Not Setting the Multimeter to the Correct Mode: One of the most frequent mistakes is forgetting to change the multimeter’s settings to the right mode (AC, DC, resistance, etc.). Always double-check that the setting corresponds to the type of test you’re performing.
- Testing Voltage in the Wrong Range: If the multimeter is set to a low voltage range, it might not provide accurate readings for high-voltage circuits. Ensure that the range is set high enough for the voltage you expect to measure, but not too high that it limits the accuracy of the readings.
- Using the Multimeter on Live Circuits Incorrectly: If you’re testing a live circuit, make sure the probes are placed securely and safely. Never touch the metal parts of the probes when they are connected to live wires.
- Not Checking Battery Levels of the Multimeter: If the battery in your multimeter is low, it may give inaccurate readings. Always ensure the multimeter is fully charged or has fresh batteries before using it.
Troubleshooting Tips for Accurate Voltage Readings
If your multimeter isn’t giving you the expected readings, follow these troubleshooting steps:
- Check the Multimeter Settings: Ensure that the multimeter is in the correct mode and that the range setting matches the voltage or current you’re measuring.
- Inspect the Test Leads: If you’re not getting a reading, check the test leads for any damage. Frayed or broken leads can result in faulty readings.
- Verify the Connections: Make sure the probes are securely placed on the correct terminals, and that the test leads are properly inserted into the multimeter’s ports.
- Try Testing a Known Good Source: If you’re unsure whether the multimeter is working correctly, test it on a known, functioning circuit to confirm that the device itself isn’t malfunctioning.
Final Verdict
A multimeter is an essential tool for anyone who works with electrical systems. Whether you’re testing AC voltage in an outlet, checking the DC voltage of a battery, or diagnosing faults in electrical appliances, a multimeter is invaluable for ensuring your devices are operating as they should. By following the correct procedures for testing voltage and using the multimeter safely, you can troubleshoot a wide range of electrical issues around your home or workplace.
However, electrical systems can sometimes be more complex, and if you ever feel uncertain about using a multimeter or encounter any electrical problems, LS Electrician Services Singapore is here to help. Our licensed electricians can assist with voltage testing, repairs, and installations, ensuring your home’s electrical system is functioning safely and efficiently.